The trending Biryani that is giving the age-old traditional Kerala Biryanis a run for their money! Rice and Masala are cooked separately in this dish. Very flavoursome.
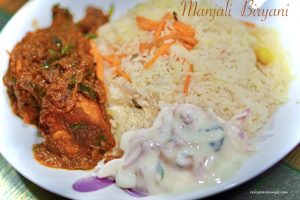
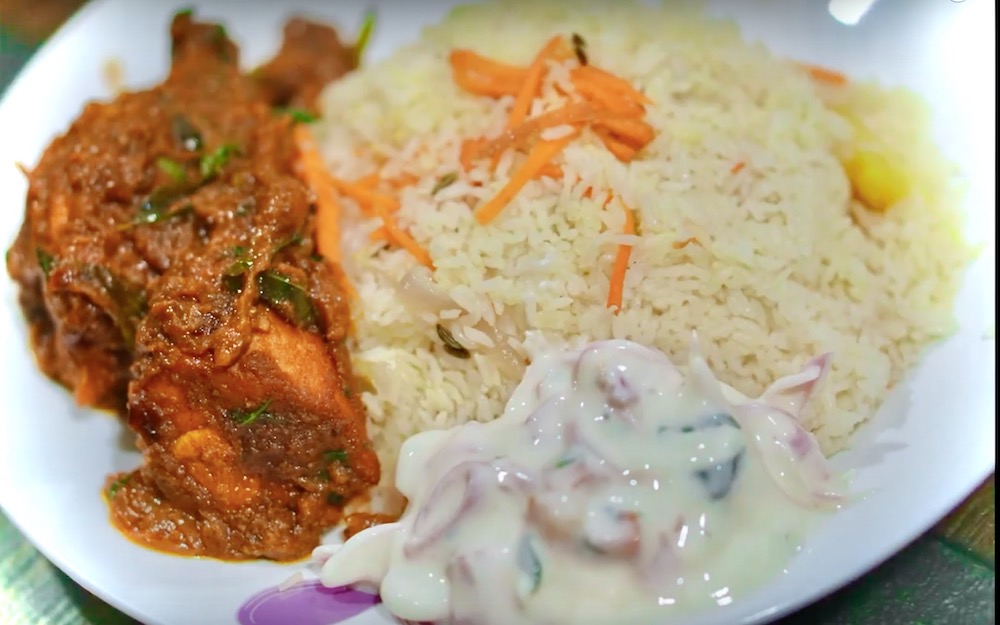
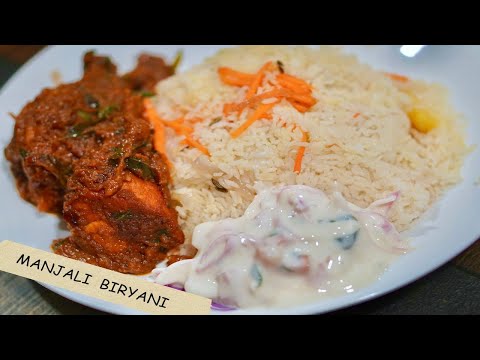
Manjali Chicken Biryani
® This is a RAS signature Recipe©
♦Prep time:10min ♦Cook time:8min ♦Yield:4Servings.
Total time is not inclusive of marinating time (20 minutes)

A detailed introduction, and related links are available on the
Recipe Intro ↓ : Check it out or scroll down for the Recipe and Video⇓.

EAT AND TELL!!! Let us know if you tried – Manjali Chicken Biryani
| ♦Mail me your pics and testimonials 🙂 – recipesaresimple@gmail.com ♦If you make the dish and share it on your social media, please don‘t forget to tag me @recipesaresimple and hashtag it #recipesaresimple on any platform. ♥Please rate the recipe if you have tried it below ↓♦Quick Browse to see All Recipes by Category.♦World Cuisines to browse recipes by Country. ♥Thanks for visiting www.recipesaresimple.com |
Manjali Chicken Biryani
Description
Manjali Chicken Biryani is a popular and distinctly different style of chicken biryani that originates from the village of Manjali in the Ernakulam district of Kerala. Unlike the more traditional layered or "dum" Malabar biryanis, it often adopts a unique preparation method.
It offers a rich, comforting, and distinct taste. The flavor is slightly different from the traditional Malabar or Thalassery Biryanis due to the prominent use of garlic in the rice and the absence of mint and yoghurt in the main masala.
Ingredients:
Marinating the Chicken:
Masala:
Rice:
Instructions
-
Marinate: Clean, rinse and drain the chicken pieces for the Biryani. Add Kashmiri chilli powder(1Tbsp), hot chilli powder(1tsp), turmeric powder(3/4tsp) and salt(1 1/2tsp). Rub these ingredients thoroughly into the chicken and set aside for 20 minutes first.
-
Prep: Add the ginger and garlic to a food processor/grinder jar, adding a little water to make a nice, smooth paste. When adding ginger, make sure you only add half (or less than half) the amount of garlic. Ginger flavour can overpower this dish very easily.
-
Slice the onions and set aside.
-
Rinse the rice several times till the water runs clear. Cover with fresh water and soak for 10 minutes ( no longer). Drain and set aside.
-
Add the marinated chicken to a wide-based pot, add 1 cup of water and bring to a boil. Reduce the heat, cover and cook for just 10 minutes.
-
The chicken will have just steamed in the water, losing its pink colour. Remove the chicken pieces at this stage and set aside, reserving the cooking broth for later.
-
Next, we will lightly fry the chicken pieces that have been removed from the liquid and drained well.
-
Using a combination of sunflower oil and coconut oil, fry the pieces in batches for under 2 minutes per side. You don't want to fry the chicken too much, just develop a pale golden crust. Set aside the par-fried chicken.
-
The Masala for Chicken: Remove all but 4 Tbsp of oil from the pot. To this, add the curry leaves first, followed by the sliced onions.
-
Patiently, on a medium flame, saute for 10 minutes. Stir continuously. You can't afford to leave the onions without stirring. Please be careful. Any charred taste of the onions will ruin the taste of the masala.
-
After 1o minutes, the onions will develop a lovely gold-brown hue. (stressing this here again: Please make sure there is no trace of black burnt onions.. really no way to make a tasty masala with that).
-
Now, add the sliced tomatoes. Stir and cook till the tomatoes have softened.
-
Add the prepared ginger-garlic paste. Sauté 〉till the raw smell of ginger and garlic subsides. Sprinkle a little water as you saute to prevent any scorching of ingredients throughout the sauteing process.
-
Add the spice powders now: Coriander powder(3Tbsp), Turmeric powder(1/2tsp), Kashmiri chilli powder(3/4Tbsp). Stir till fragrant. Don't cook too long.
-
Add the reserved cooking broth now, as well as 1 & 1/2 cups of water as needed. Add water according to the amount of broth that is left. You need just enough liquid for the par-fried chicken to be added to. The masala should not be watery in the end.
-
Sprinkle over the Garam Masala now. Taste and add salt as needed after tasting. Stir well.
-
Return the par-fried chicken now. Add some water if the liquid you added doesn't coat the pieced enough. (Refer Video). Toss the pieces to coat well. Reduce the heat to the lowest and cook till the chicken is tender, stirring occasionally.
-
Add the freshly chopped coriander leaves and stir through.
-
Once you have ascertained that the chicken is tender and the gravy, thick and coating the pieces, add the lime juice and ghee. Stir through once again and set aside the prepared Chicken Masala.
-
Cook the rice: Heat a heavy-based pot with a lid suitable for cooking the rice.
-
Add the ghee. Once hot, add the sliced onion and saute till golden.
-
Add the garlic paste for rice (5 large cloves of garlic ground with 1/4 cup water).
-
Add the whole spices (Cinnamon, Cardamom, Cloves, Star Anise, Fennel seeds).
-
Sauté till the raw smell of garlic is gone!
-
Add 8 cups of water and 3 1/2 tsp salt. As soon as the water comes to a boil, add the well-drained rice. Sir once.
-
Add lime juice(1 tsp). Cover and cook on low heat till rice is cooked. Don't stir in between.
-
sealed, Dum cooking method.
-
Towards the end but when there is still some water left in the rice, add the grated carrot and chopped pineapple. Stir through. Cover tightly again and seal with prepared raw dough. Place the pot on your smallest burner on the lowest heat and 'dum' for 10 minutes. ie, Cook to form steam inside the sealed pot.
-
Turn off. Allow to cool off for a while. Break the seal and fluff up the rice.
-
Serve with the Masala on the side OR place chicken masala in the centre of the plate, and cover with the rice, like a biryani. Great served hot with raita and papad.
Note
- Yoghurt and Mint leaves are not used in Manjali Biryani. But it's a cooks prerogative. Green Chillies and pepper powder are also left out. Good quality red chilli powder is the key to this Biryani.
- While cooking the masala, curry leaves are the first to go into the oil In the video, I forgot and added them later.
- The garlic used should be double the quantity of ginger here, unlike many biryanis where they are used in equal proportion. The flavour of ginger can easily be overpowering if you add more, so do not add more than specified.
- My Kerala Garam Masala is best for this recipe.
- Key Ingredients: Chicken, Rice(Kaima), Onion, Garlic, Ginger, Tomato, Coriander leaves, Curry leaves, Lime, Ghee, Oil, Coconut oil, Spices ( powders and whole spices), Pineapple and