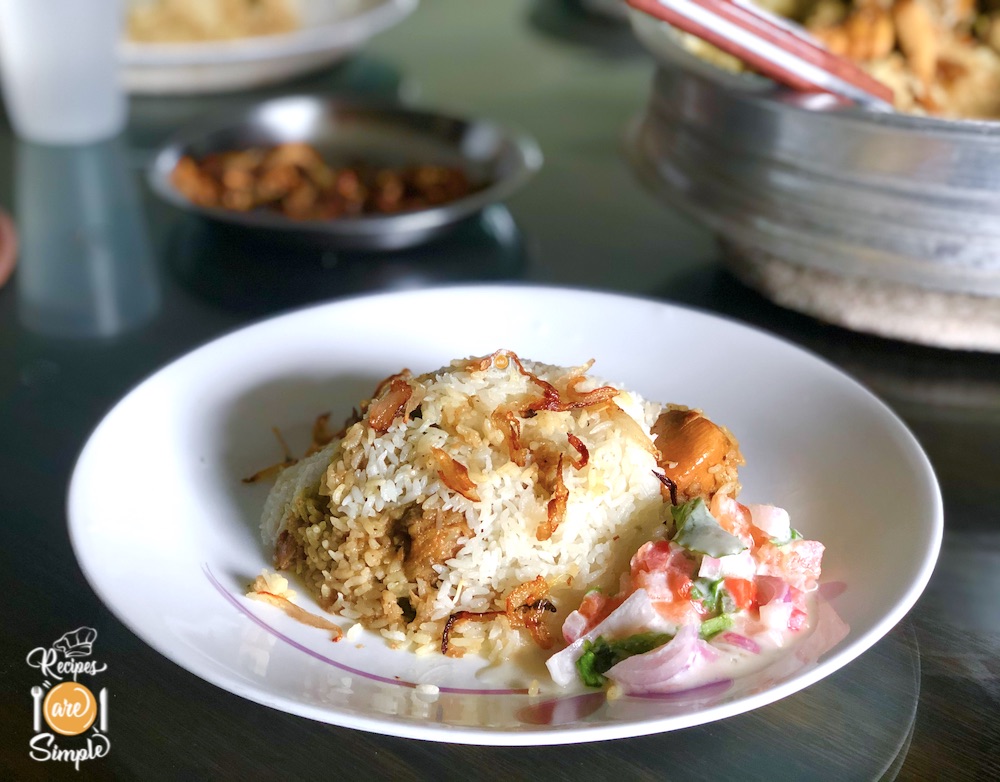
A simple, elegant Malabar style Biryani. Popular with the masses. One of my family favourites. Sometimes the Simplest Biryani, tastes the best!
Malabar Chicken Biryani

® This is a RAS signature Recipe©
A detailed introduction and other Biryani links are available on the
Recipe Intro ↓ Check it out or scroll down for the recipe ⇓.


TIP:
Kaima rice, also known as Jeerakasala rice, is a premium, short-grain rice variety primarily cultivated in the Wayanad region of Kerala, India. Its name, “Kaima,” refers to its small, fine grains. It’s also known as Gobindobhog in Bengal and other regional names. This rice is particularly celebrated for its distinctive sweet and nutty aroma, often compared to the fragrance of cumin (hence “Jeerakasala,” meaning “cumin storehouse”).
Key characteristics of Kaima Rice:
- Short Grain: Unlike the long grains of Basmati, Kaima rice has small and somewhat round grains.
- Aromatic: It possesses a strong and pleasant aroma, which intensifies during cooking. This fragrance is a key reason for its popularity in specific dishes.
- Flavorful: It has a subtly sweet and nutty flavor that complements rich and spicy dishes.
- Non-Sticky: When cooked properly, the grains remain separate and fluffy, making it ideal for dishes where individual grains are desired.
- Absorbs Flavors Well: Its texture allows it to absorb the flavors of spices and sauces effectively, making it a preferred choice for biryanis and pulaos in certain regions.
- Digestible: Kaima rice is considered easy to digest and is sometimes used in Ayurvedic diets.
- Regional Significance: It is particularly prized in Malabar cuisine, especially for making the famous Thalassery Biryani and Ney Choru (ghee rice). It’s also used in sweet dishes like Payasam.
Comparison between Kaima Rice and Basmati Rice:
| Feature | Kaima Rice (Jeerakasala) | Basmati Rice |
|---|---|---|
| Grain Length | Short and somewhat round | Long and slender |
| Aroma | Strong, sweet, and nutty (cumin-like) | Pronounced, floral, and sometimes described as nutty or popcorn-like |
| Texture | Soft and fluffy, grains remain separate | Light, fluffy, and elongated grains |
| Flavor | Subtly sweet and nutty | Mild, nutty flavor |
| Stickiness | Generally non-sticky | Non-sticky when cooked correctly |
| Main Use | Biryanis (especially Malabar), ghee rice, sweet dishes | Biryanis (especially North Indian), pilafs, steamed rice, side dish for curries |
| Origin | Primarily Kerala, India | Himalayan foothills of India and Pakistan |
| Appearance | Small, golden-hued grains | Long, slender, translucent grains |
| Glycemic Index | Medium (as with most white rice) | Medium to low, depending on the type (brown basmati is lower) |
In essence:
- Choose Kaima rice if you prefer a short-grained rice with a strong, sweet aroma and a flavor that complements the spices in Kerala-style biryanis and other regional dishes. Its ability to absorb flavors makes it a star in these preparations.
- Choose Basmati rice if you desire long, elegant grains with a more delicate floral aroma and a lighter nutty flavor. It’s a versatile rice that works well in various cuisines, especially North Indian biryanis and pilafs where the long, separate grains are visually appealing.
While both are aromatic and non-sticky when cooked correctly, their distinct grain size, aroma profiles, and regional culinary associations set them apart. They are both considered premium rice varieties in their respective culinary traditions.
EAT AND TELL!!! Let us know if you tried – Malabar Chicken Biryani
| ♦Mail me your pics and testimonials 🙂 – recipesaresimple@gmail.com ♦If you make the dish and share it on your social media please don‘t forget to tag me @recipesaresimple and hashtag it #recipesaresimple on any platform. ♥Please rate the recipe if you have tried it below ↓♦Quick Browse to see All Recipes by Category.♦World Cuisines to browse recipes by Country ♥Thanks for visiting www.recipesaresimple.com |
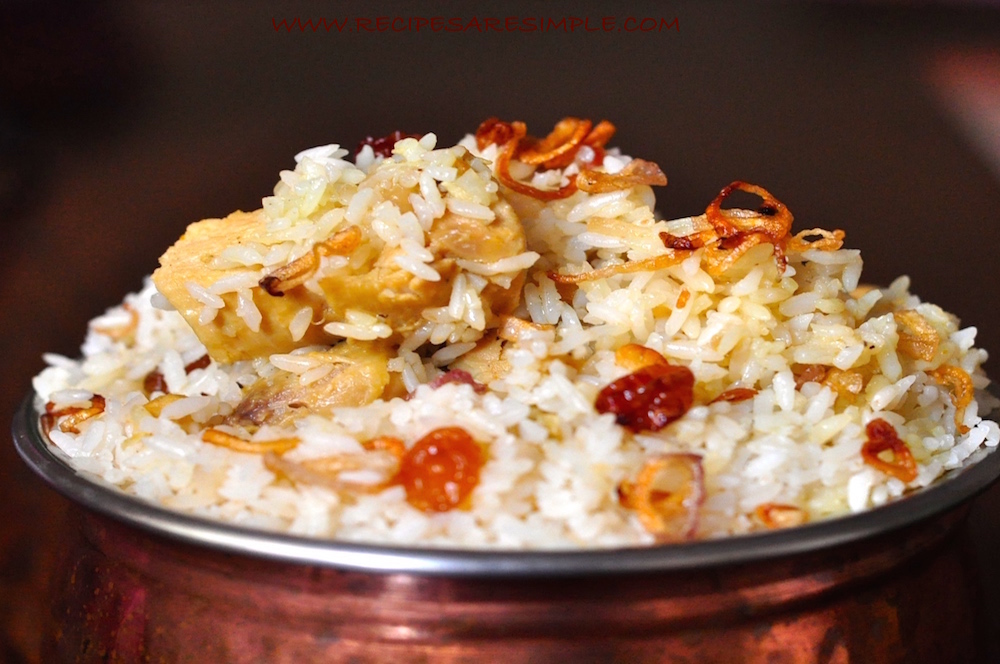
Malabar Chicken Biryani
Description
Malabar Chicken Biryani is a fragrant and flavorful rice dish hailing from the Malabar region of Kerala, It's a unique biryani distinguished by its blend of local spices, the use of short-grain aromatic rice (often Kaima or Jeerakasala), and a cooking style that emphasizes the aroma and subtle spicing rather than intense heat.
Ingredients:
For Marinating Chicken:
For Rice:
Garnish:
Instructions
-
Marinate the chicken with 1 tsp salt and Yogurt and 2 tsp each of the ginger and garlic pastes. 15 - 30 minutes.
-
In a large saute pan or pot, heat the dalda, and ghee together.
-
Fry the onions till crisp and golden ( Keep your eyes on this, it may seem to take time at the beginning but they burn very quickly).
-
Remove with a slotted spoon & set aside.
-
Next fry kismis/sultanas till plump & set aside.
-
Fry cashew nuts till golden & set aside.
The rice:
-
Remove any grits from the ghee left in the pan. Remove all but 4-5 Tbsp ghee.
-
To this, add the whole spices and fry lightly.
-
Add 7 cups (previously boiled) hot water and bring back to a simmer.
-
Add 4 - 4 ½ tsp salt (to taste) as well as the washed, drained rice.
-
Stir and cook covered tightly on medium heat till water runs dry and you can fluff up the rice.
The Masala:
-
In another deep pot. Heat ghee and dalda(for the masala).
-
Add remaining ginger & garlic pastes along with the green chilli paste.
-
Sauté gently to a nice light golden colour.
-
Add onion and a dash of salt and continue sautéing, till softened and just changing colour.
-
Add chicken and stir fry well on high heat. Stir fry till the chicken becomes white.
-
Add the mint, coriander leaves and garam masala (see notes).
-
Add tomato and stir-cook till liquid runs dry and the tomatoes are reduced to a pulp.
-
Stir in some of the fried onion to this (about ¼ cup loosely packed).
-
Mix in the lime juice/yoghurt. Stir till combined.
-
Cook covered, on low till chicken is done and liquids evaporate.
The layers of "dum" - Steam sealed - baking layers:
-
Transfer the chicken masala to the 'Dum' pot or baking dish.
-
Layer half of the rice over this.
-
Over this layer, sprinkle milk and rose water (mixed together) and also scatter some fresh coriander, mint and garam masala(powder).
-
Then layer the rest of the rice followed by some more garam masala, fried onions, cashews, and raisins.
-
Cover and seal the lid, with a kneaded dough making sure the steam cannot escape.
-
Place the pot on a flat griddle pan and cook on the stovetop on low-medium heat for about 20 minutes.
-
Alternatively; cover with aluminium foil and bake for 20- 30 minutes at 190 °c /375° F. Turn off the heat source. Leave undisturbed for at least 30 minutes.
-
Spoon out the rice carefully first and set aside in a large plate.
-
Next, transfer the chicken pieces gently to the serving dish/platter.
-
Return half the rice to the masala on the bottom and gently toss to coat the rice with the chicken masala.
-
Add the remaining white rice on top just folding over masala a few times so that the rice stays a nice white colour. Serve with the chicken pieces and the fried garnish. Yummy!
Note
- Key Ingredients: Chicken, Rice, Spices, Onion, Ginger, Garlic, Tomatoes, Herbs, Yoghurt, Salt, Rosewater, Milk