
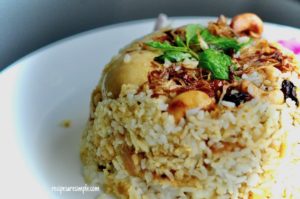
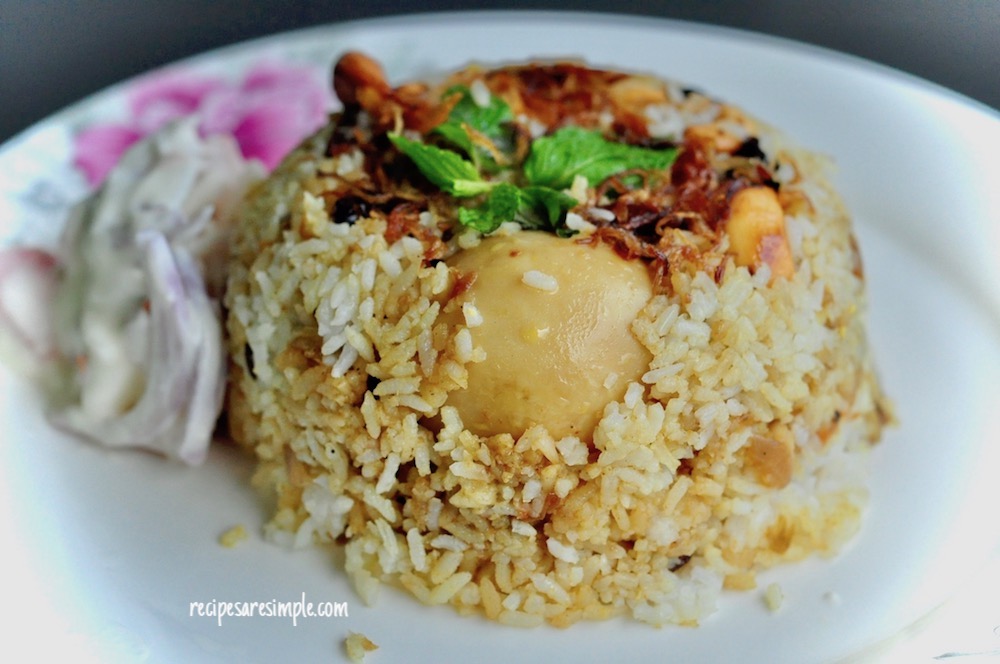
A specialty Egg Biryani from the Malabar region. Served with a basic raita and pappad, this is a simple but truly delicious version of Biryani for you to try. You’ll be pleasantly surprised that such a yummy Biryani can be made without any meat.
Egg Biryani – Thalassery Special
® This is a RAS signature Recipe©
A detailed introduction, and related links
available on the Intro page ⇓. Check it out or scroll down for the recipe ⇓.

|
♦Let me know if you tried – Egg Biryani – Thalassery special. Please comment below. ♦You can also – Mail me your pics and testimonials 🙂 – recipesaresimple@gmail.com ♦on SOCIAL MEDIA tag me @recipesaresimple and hashtag it #recipesaresimple on any platform. Thank you so much! ♥ |
♦Quick Browse to see All Recipes by Category. ♦World Cuisines to browse recipes by Regional Cuisine.
♥Thanks for visiting www.recipesaresimple.com
Egg Biryani – Thalassery Special
Description
Thalassery Egg biryani offers a delightful balance of flavors in this relatively simpler Thalassery Biryani preparation. The fragrant rice provides a subtle sweetness, while the spiced egg masala adds a savory, spicy kick. The overall taste is rich, aromatic, and deeply satisfying.
Ingredients:
For Rice:
For the Egg Masala:
For the Fried Garnish:
Instructions
Rinse And Soak Rice:
-
Rinse the rice thoroughly. Keep rinsing till the water runs clear.
-
Cover the rice with fresh water and soak for 10 minutes. No more. Keep the rice drained, and set aside.
-
Boil Perfect Eggs: ( refer notes). Set aside.
Fry the Garnish:
-
Heat the ghee(for the rice) in a nonstick pot, suitable for cooking the rice. Once hot, first add the cashew nuts and fry briefly till they turn golden. Strain from the ghee quickly and set aside. In the same ghee also fry the ‘kismis’ very briefly. As soon as the raisins become plump, remove them from the ghee with a slotted spoon and set them aside along with the cashews.
-
Now, in the remaining ghee, we will fry the thinly sliced onion till golden and crisp. Don’t allow the onions to go dark. This can happen in an instant if you don’t watch them carefully. Remove and spread over a spider strainer so that they become crisper as they cool off. Set all the fried garnishing items aside.
Cook the rice:
-
In the remaining ghee, left in the pot add all the whole spices. Allow to crackle and become fragrant, without any darkening.
-
To this, add the drained rice and fry lightly till you can smell the rice and the grains are glossy and have attained have just faintly changed in color. Stir very gently, approximately 2 minutes on medium-low heat.
-
When the rice is fragrant, that’s the sign that we can add our water now. Add the boiled (hot) water and salt. Also add lime juice to ensure that the rice is nice and bright in color, once cooked.
-
Give this A stir. Cover and cook on the lowest heat, till all water is absorbed. Only stir once, halfway through. It should be cooked in less than 10 minutes. Open the lid and check on it occasionally.
Prepare Egg Masala:
-
While the rice is being cooked, we can start on the masala. Heat the ghee ( for the masala) in a non-stick pan. Add the sliced onions and saute until softened.
-
Once the onions are softened and translucent, add the ginger, garlic, and green chilli pastes. Saute till the raw smell dissipates.
-
Add the spice powders (except the garam masala). Stir till fragrant again without scorching the spices. You know the spices are cooked when the strong scent of the coriander powder, mellows down a bit.
-
Add the chopped tomatoes, stir and saute briefly. Cover and cook on low for 2 minutes to steam the tomatoes. Open and continue to mash the tomatoes well.
-
Once the tomatoes are mashed to a pulp, add the yogurt and stir briskly to incorporate evenly into the masala. Do this very quickly to prevent any curdling.
-
Add salt to taste ( 1/2 tsp), followed by the chopped fresh herbs. Stir and allow the herbs to wilt slightly.
-
Now, place the boiled eggs over the masala. Using a wooden ladle gently fold the masala over the eggs. Make sure the eggs are covered well with the masala. Sprinkle some water over the masala, only if it seems a bit dry.
-
Also, sprinkle the garam masala over the masala at this point. Cover and cook on low for about 2 minutes. Set Aside.
The ‘DUM’: (Sealed Cooking):
-
Preheat the oven to 275 º C / 526ºF.
-
Once the rice is cooked, immediately fluff up the rice (gently) from the bottom of the pot. Do not over mix. Simply fluff and loosen the grains and allow the excess steam to escape. I often leave the rice under a ceiling fan to cool down.
-
Use a wide and heavy-based vessel/pot to layer and bake the Biryani. Add half of the cooked rice to the bottom. Sprinkle some chopped coriander over this. Leave this layer to cool, if you still have lots of steam coming from it. (Make sure to break up any lumps in the rice when you prepare the ‘DUM’. Also, remove some of the whole spices now, to prevent biting into it layer.)
-
Next, put all the egg masala over the rice. Make sure the eggs lie near the center. Gently spread the masala over the rice, without breaking the eggs.
-
Top with the remaining cooked rice. Use some of the fried garnish to garnish the top. Reserve the rest for individual servings.
-
Seal the top with two layers of foil paper. Seal the edges tightly all around, to prevent any steam from escaping.
-
Place the Biriyani Dum Pot, on the lower rack ( with heat from above and below). Bake 20 minutes. Leave in the oven for at least 30 minutes before serving. Open, toss gently, starting from the sides, with a flat Biryani ladle. Make sure you don’t break the eggs! You want to incorporate the masala into the rice, evenly distributing the color while not over mixing it. Once the rice is mixed, cover and rest until serving time. This allows all the fragrance and flavor to permeate through the dish perfectly.
-
Serve Egg Biryani warm or hot. You can always place this bake in the oven for 10 -15 minutes to have it hot if you are serving it later. Usually, in a heavy-based pot, it stays hot for quite some time, if kept covered.
-
Thalassery Egg Biryani is ready! Serve with Raita. It’s Egg-cellent! 🙂
Note
- Get my Nadan Curry Masala / Kerala Garam Masala recipe here:
- (Perfect Boiled Eggs for Egg Biryani) – Add the eggs to a small saucepan and cover with enough water to just totally cover the eggs. Keep an eye on it till it comes to a boil. As soon as this reaches a ‘rolling boil’, cover the saucepan with a tight lid, turn off the heat, and set the timer for ten minutes. After ten minutes, remove the hot water from the saucepan. Shake the saucepan with the eggs, so as to crack the eggs lightly. Cover the eggs with fresh water again and set aside for 5 minutes. After 5 minutes, the water will be warm again. Discard this, and cover the eggs with fresh water once more. Now take each egg and tap the wide bottom on the side of the saucepan. Start to peel the eggs and make sure youpeel off the layer of white protein (membrane) skin that lies under the shell. This helps to peel the eggs easily. Boiling this way, followed by cracking lightly and leaving in the water again, helps water to seep through the shell and lift up the white membrane so that it is easier to peel. Often times, if we start peeling the eggshell without the white skin directly beneath it, this causes tiny chips of eggs shell to crack as we peel and this makes the process go on for a much longer time, and can also cause the final – peeled egg to looks messy and not have that smooth finish that we are after. Boiling, for the specified amount of time also ensures that the yolk does not develop a greyish outer color which happens when another membrane surrounding the yolk is overcooked( a chemical reaction between sulfur and iron in the egg). Yellow yolks look much prettier, especially if you have your eggs sliced in half.
- Ginger and Garlic Pastes are made, simply by grinding fresh ginger or garlic to a smooth puree with very little or no water. Ginger-Garlic Paste may be used instead. Use 1 1/2 Tbsp if using GG Paste. You might like to check out my video on how to make Ginger- Garlic Paste as well as Ginger and Garlic Pastes. Comes in extremely handy in Indian cooking if you stock up on some.
- Key Ingredients: Biryani Rice, Eggs, Spices, Onion, Ginger, Garlic, Chilli, Tomatoes, Mint, Coriander, Yoghurt, Lime, Oil, Salt, Ghee.

On the way to kitchen to cook it. But loved the way you explained the tiny details. 😀