Home Made Bread for Beginners with Video
Theres something just so soothing about home made bread, from the aroma to the slicing of that baked fresh luscious loaf!
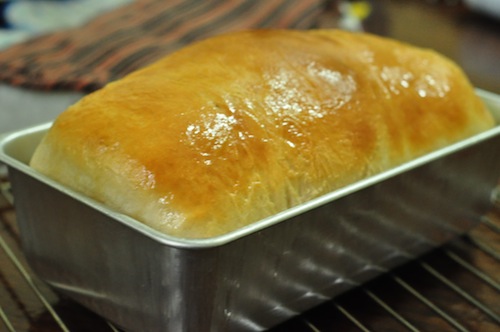
I have made this many times with excellent results every time. Here’s the Recipe for Home Made Bread for Beginners with Video.
Home Made Bread for Beginners with Video
Ingredients:
- 3 + ¾ cups All purpose flour OR Bread Flour
- 1 ½ Tbsp Sugar
- ½ Tbsp Salt
- 1 Tbsp Vegetable Shortening
- 1 Packet (11gms) Fast Acting OR regular active DRY Yeast
- 1 and ¹⁄8 cups VERY warm water (120-130ºF /49-54ºc)
- 1 Tbsp Melted butter – optional
- FLOUR FOR DUSTING
Method:
- To a large bowl OR (I like to use my food processor with plastic attachment), add half the amount of flour,the sugar, salt, vegetable shortening and yeast.
- Process or Mix well till combined. (Seasoned bakers may not use a food processor, but i find for beginners ,this method works great!)
- Add warm water. Pulse till the flour runs together, adding a little bit of the remaining flour at a time.
- When all flour is added, pulse till the dough forms a single mass. It should be soft and elastic to touch.
- On a lightly floured surface, knead the dough by pulling in towards you, then pushing away with the heels of your hands in a rocking motion, then folding, turning and repeating like shown in the VIDEO.
- Knead for 10 minutes. The dough will be smooth and springy. Form into a small ball.
- Grease a large bowl with shortening. Place the ball of dough in the bowl.
- Turn so that the dough is greased all around.
- Cover the bowl loosely with plastic/ saran wrap and set aside in a warm place for around 1 hour.
- The dough will have doubled in size.
- When the dough is ready, an indentation mark will be left if touched.
- Punch the dough in the centre to deflate(GENTLY). This creates air which helps to give the bread a better texture.
- On a lightly floured surface, roll the dough to a 18 × 9 ” rectangle ( the width should be approximately that of length of your Loaf pan.(see video)
- Roll the dough up tightly, beginning at the 9″ side, roll towards yourself, pinching to secure with fingers after each turn.
- Seal the seam and both sides by pinching gently as well.
- Lay the seam side down, into the loaf pan.
- Cover loosely with plastic wrap and allow to sit for about 35-50 minutes till doubled in size. Remove the plastic wrap.
- Place in ta COOL oven on a rack above a tray. Turn the heat on to 425ºf/218ºc.
- When the oven is HOT, after 10 minutes or so, add a few ice cubes to the lower tray. Close the oven door quickly. This produces steam so that the crust will not harden too quickly.(which prevents the bread from rising properly)
- Bake a total of about 25-30 minutes (depends on oven) or till bread is risen, has a golden brown crust and sounds hallow when tapped.(Don’t be fooled by the sound. Your breads crust is firm and may seems hard right now but the bread is perfectly soft.)
- Remove from pans to cooling rack. Brush with remaining butter. Allow to cool completely.(1 ½-2 hours)
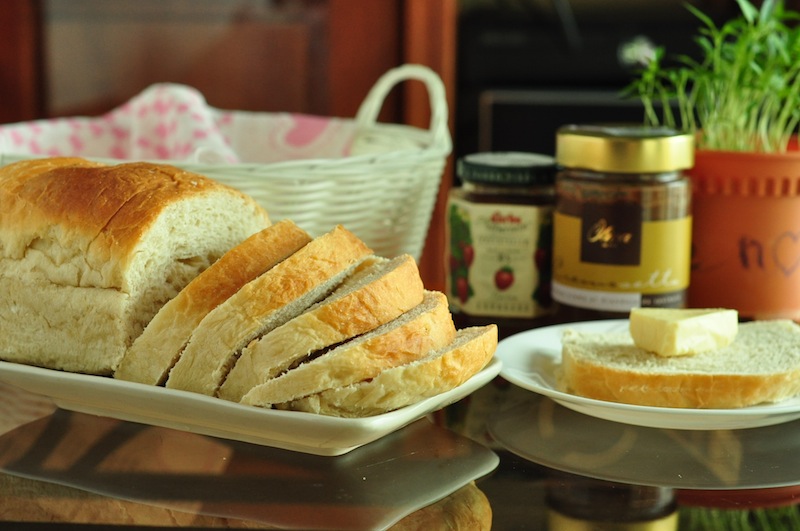
- Slice with a long, sharp, serrated knife and serve toasted or plain with your favorite spread.
- Slice to desired thickness.
Home Made Bread for Beginners with Video
Did you enjoy our Home Made Bread ?
Notes:
- Let the bread cool completely before slicing. The bread should reach an internal temperature of at least 180°F before taken out of the oven. At this point, the bread is still baking and drying out. Let it cool two hours before slicing. If you cut into it before that it will look underdone or soggy.
- Remember that if you do not allow bread to cool for at least two hours before slicing, it can appear soggy inside, even though it is done all the way through. Bread “sweats” as it cools and dries out inside. The sweating will make the crust softer, but it will harden up again after it is fully cool.
- This post initially stated the amount of yeast as 11 oz. Hope no one actually tried with 11 oz.. 😀
You May Also Like:





Would you be able to let me know exactly how much flour is used. Whether it is 3 cups or 4 cups. I would love to try making this bread.
Add 2 cups initially till well mixed, gradually add the remaining 2 cups. (Like 1/2 a cup at a time). I usually end up using the entire 4 cups but check each time after processing/mixing for a bit. If your dough seems like it wont hold together upon adding more flour, stop.
Also please note that oven temperatures vary according to size/ door etc so… when you turn out the bread if the bottom seems a bit moist. just pop it back in the oven again for a bit longer.
Apart from the (waiting till the dough has risen) – this is quite an simple technique. If your a first timer, be patient while kneading 🙂
This bread is very soft and had an awesome crust. We recommend it be consumed within 2 days. And after the first day I keep mine in the fridge.
Hope this helps.
I am excited and was trying to bake my first bread for my grandkids…however I am I wonder if it will turn out successful. Anyway, I will try this recipe. Thanks.
Hi! I will keep my fingers crossed that your first attempt is not wasted. Remember that first time you must pace yourself. Take your time and do not rush it along with lots of other work on the same day. My first attempt was not perfect, but with a couple of attempts I learned how to manipulate my temperatures and dough etc.. Later you can tell by smelling and tasting is the fermentation has taken place correctly too. And then the experimenting can begin with fruits, nuts etc…Happy Cooking.
Helpful.thks!!!